1. Obtain NuttX source code
Create a directory for the source code, here it is assumed that the nuttx-git folder is on your home directory ~/
mkdir ~/nuttx-git && cd ~/nuttx-git
Clone the source code from git repo
git clone https://bitbucket.org/nuttx/nuttx.git nuttx
git clone https://bitbucket.org/nuttx/apps.git apps
git clone https://bitbucket.org/nuttx/tools.git tools
2. Prepare kconfig-frontends
cd ~/nuttx-git/tools/kconfig-frontends
./configure
make
sudo make install
sudo ldconfig
Go to nuttx directory and get ready for next step
cd ~/nuttx-git/nuttx
3. Configuration
cd ~/nuttx-git/nuttx/tools
(Note that this tools directory is within nuttx folder, which is different from earlier tools directory! Wrong directory and there won't be any configuration file for you later :D )
- If using microUSB to USB cable
./configure.sh stm32f4discovery/usbnsh
- If using UART-TTL to USB cable
./configure.sh stm32f4discovery/nsh
cd ~/nuttx-git/nuttx
make menuconfig
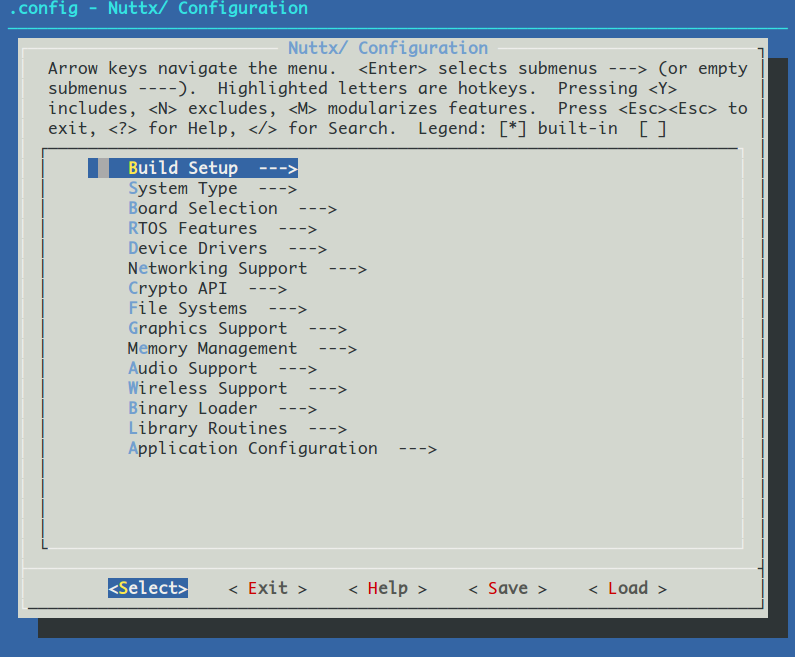
At this point, you should see a GUI for Nuttx Configuration, using your cursor:

- Choose
Build Setup --->- Choose
Build Host Platform (...) --->- Select
(X)Linux - Exit
- Select
- Exit
- Choose
- Choose
System Type --->- Choose
Toolchain Selection (...) --->- Select
(X) Generic GNU EABI toolchain under Linux - Exit
- Select
- Exit
- Choose
- Exit & Save
4. Installation
cd ~/nuttx-git/nuttx/
make
You should now be able to see two files name nuttx and nuttx.bin your nuttx directory.
Congratulation, you have just succesfully built the nuttx for STM32F4 Discovery board. Similar steps could also be done for other supported ARM-based boards.
5. Reference
This section is adapted from here. The original article was intended for STM32F4 Discovery, which is running on ARM Cortex M4.